
How to Set Up ActiveLayer in WPForms (Step by Step)
Updated: Aug 21, 2026
A step-by-step walkthrough: create a project, generate an API key, install the plugin, and switch protection on for your WPForms forms.
Tired of spam submissions cluttering your WPForms inbox? In this tutorial, you’ll learn how to set up WPForms spam protection with ActiveLayer, an AI-powered filter that blocks spam before it ever reaches you. Your visitors won’t see any CAPTCHAs or puzzles to solve. Everything happens invisibly in the background, in milliseconds.
ActiveLayer works with both WPForms Lite and WPForms Pro, and the free plan includes 200 spam checks (one-time), so you can complete this entire tutorial without spending anything.
In This Article
What you’ll need before starting: a WordPress site with WPForms installed (Lite or Pro, any version), and admin access to your WordPress dashboard. That’s it.
Step 1: Create Your Free ActiveLayer Account
First, head over to activelayer.com and sign up for a free/pro account. The free plan includes 200 spam checks (one-time), and you don’t need to enter a credit card.
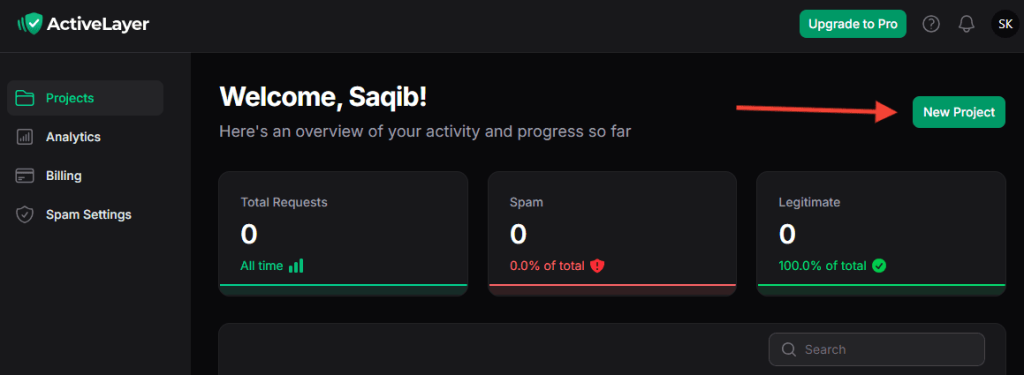
After sign-up, complete the ActiveLayer app onboarding and create a project. Your project page shows the API key to connect WordPress.
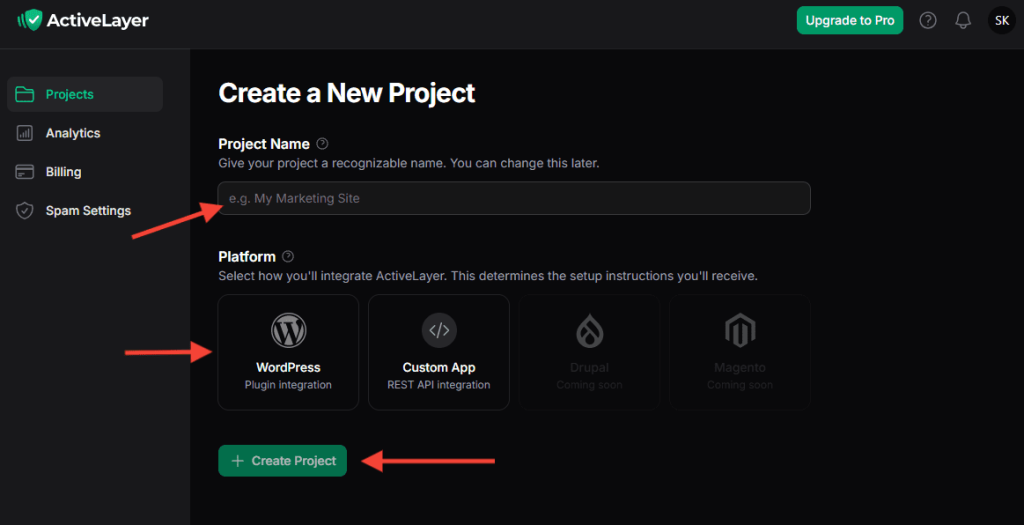
Enter your Project Name (which can be used to recognize your site), select your Platform, and then click on the Create Project button.
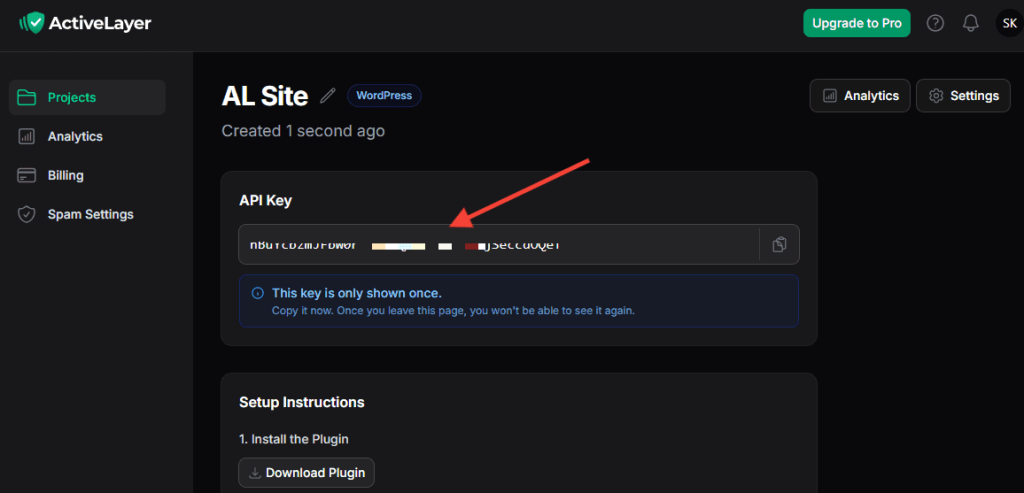
From the next page, you’ll be able to copy the API key. This key connects your WordPress site to ActiveLayer, so copy it or keep this tab open. You’ll need the key in Step 3. Also, note that this key is displayed only once.
Step 2: Install the ActiveLayer Plugin
Now switch over to your WordPress dashboard.
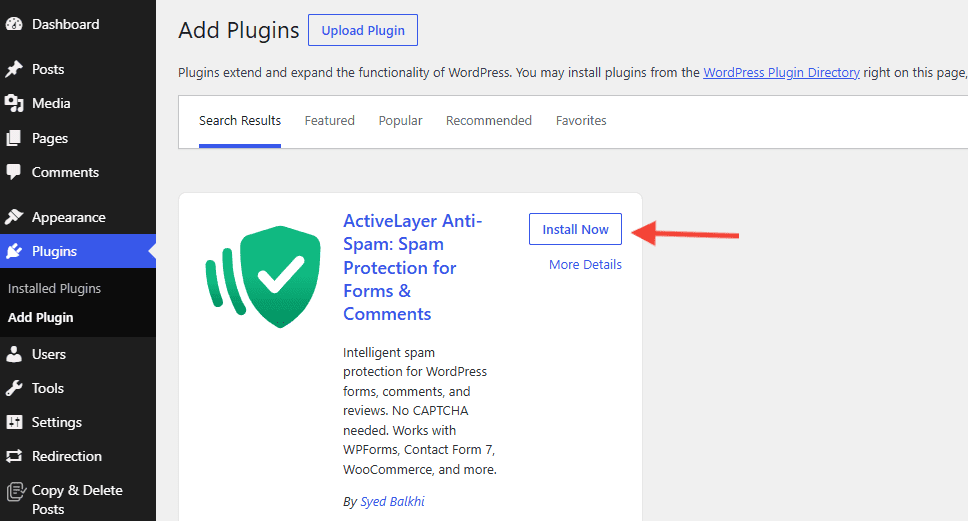
- Go to Plugins > Add Plugin.
- Search for ActiveLayer.
- Click Install Now and then activate the plugin.
After activation, WordPress opens the Welcome to ActiveLayer screen. If you already have a key, select I already have an API key.
Step 3: Connect Your API Key
Next, let’s connect your site to your ActiveLayer account.
- In your WordPress dashboard, go to ActiveLayer > Settings.
- Paste the API key you copied in Step 1 into the API key field.
- Click Verify key.
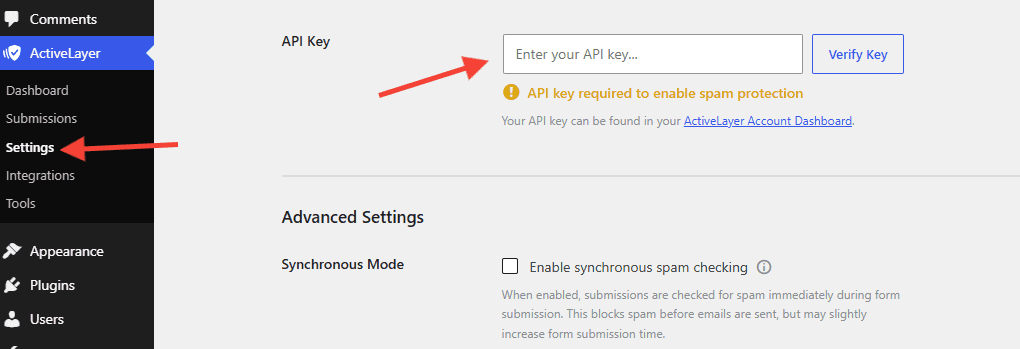
When the key is verified successfully, you’ll see a green checkmark. That means your site is now talking to ActiveLayer.
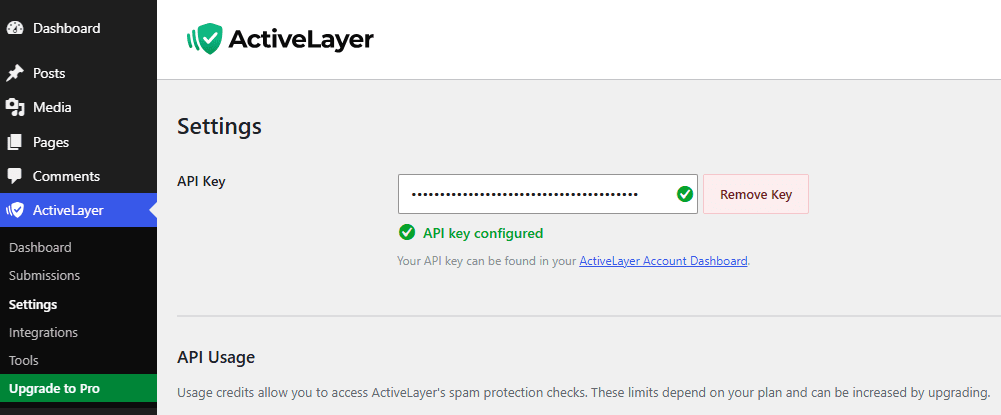
If you don’t see the green checkmark, double-check that you copied the entire key with no extra spaces at the beginning or end.
Step 4: Enable the WPForms Integration
Go to ActiveLayer > Integrations. WPForms is enabled by default. To exclude individual forms, click Configure next to WPForms, untick those forms, and save the settings.
- WPForms protection is on by default once your API key is connected.
- Integration checkbox changes save immediately.
This will enable ActiveLayer for all your forms in WPForms. To enable it for individual forms, click Configure, then select the form you’d like to protect.
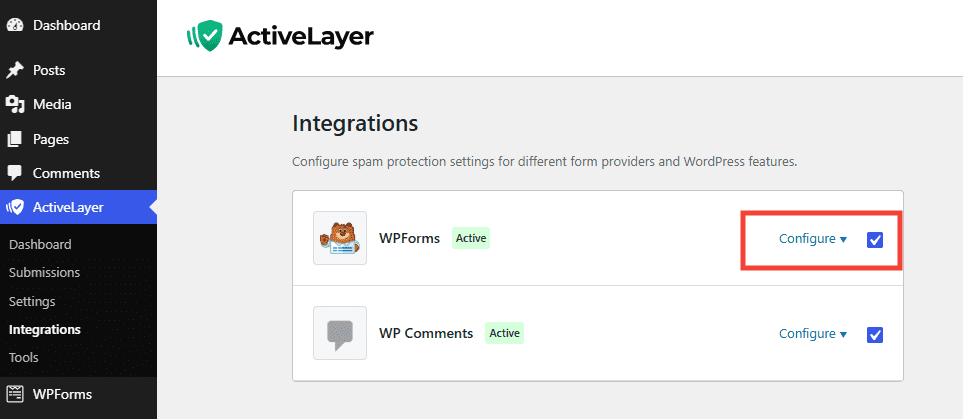
Alternatively, you can do this directly from WPForms.
- Go to WPForms > All Forms and open your form in the form builder.
- Click Settings in the left menu, then choose Spam Protection and Security.
- Under ActiveLayer, confirm Enable ActiveLayer Protection is on (the default). Switch it off only to exclude this form.
- Save your form.
Your form is protected by default. Repeat these steps only if you need to exclude a form.
What Happens Next?
From now on, submissions on your protected forms are checked while your plan has available checks. The Free plan includes 200 checks in total; once they run out, submissions go through unfiltered until you upgrade. Real messages arrive in your inbox exactly as before. Spam gets caught before it’s ever delivered, so your visitors never see a CAPTCHA.
Review checked requests and their Spam or Clean verdicts in ActiveLayer Analytics. Your WordPress admin also lists checked submissions under ActiveLayer > Submissions.
Ready to stop spam for good? Create your free ActiveLayer account, and you’ll be protected in the next five minutes.
Need help?
Contact ActiveLayer support if you run into issues with the installation, API key, or configuration.
Support & billing: [email protected]