
How to Stop WS Form Spam with ActiveLayer
Would you like to stop spam submissions in WS Form without adding a CAPTCHA to your forms? ActiveLayer checks every submission with AI on its servers and blocks spam before the entry is saved or any email goes out.
This tutorial will show you how to set up ActiveLayer with WS Form, manage protection for individual forms, and review what ActiveLayer has checked. To see everything ActiveLayer does for WS Form, visit our WS Form integration page.
In this article:
Requirements:
- You’ll need WS Form installed and activated on your WordPress site. Both WS Form Lite and WS Form Pro are supported.
- You’ll need an ActiveLayer account. The free plan includes 200 spam checks and doesn’t require a credit card.
Creating Your Free ActiveLayer Account
To get started, you’ll need an ActiveLayer account. Go to activelayer.com and sign up for a free or paid plan. The free plan includes 200 spam checks and doesn’t require a credit card.
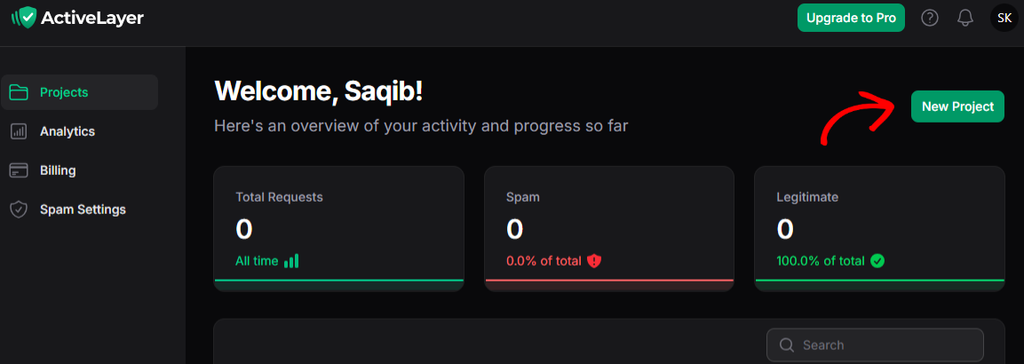
Once you’ve signed up, you’ll land on your ActiveLayer dashboard at app.activelayer.com. Click the New Project button.
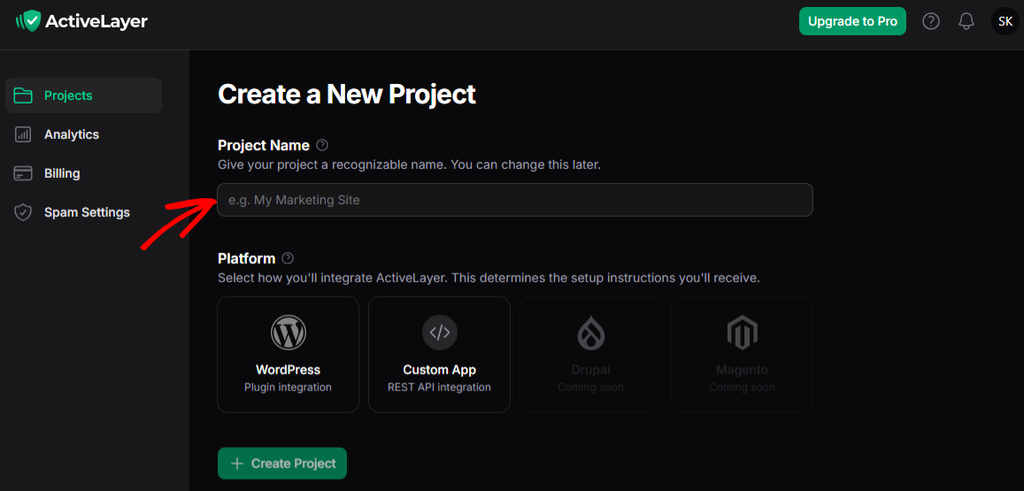
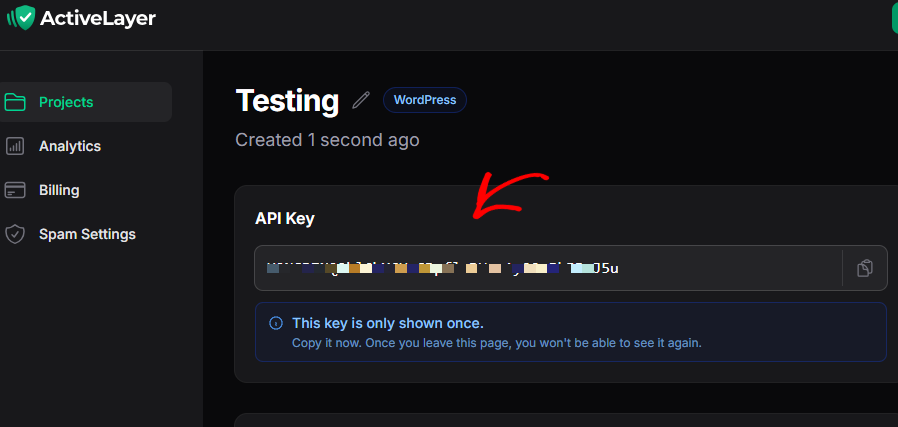
Next, enter a Project Name, select your Platform, and click Create Project. Your API key will appear on the next page.
Note: Your API key is only shown once. Copy it somewhere safe, or keep this tab open until you’ve connected it to WordPress.
Installing the ActiveLayer Plugin
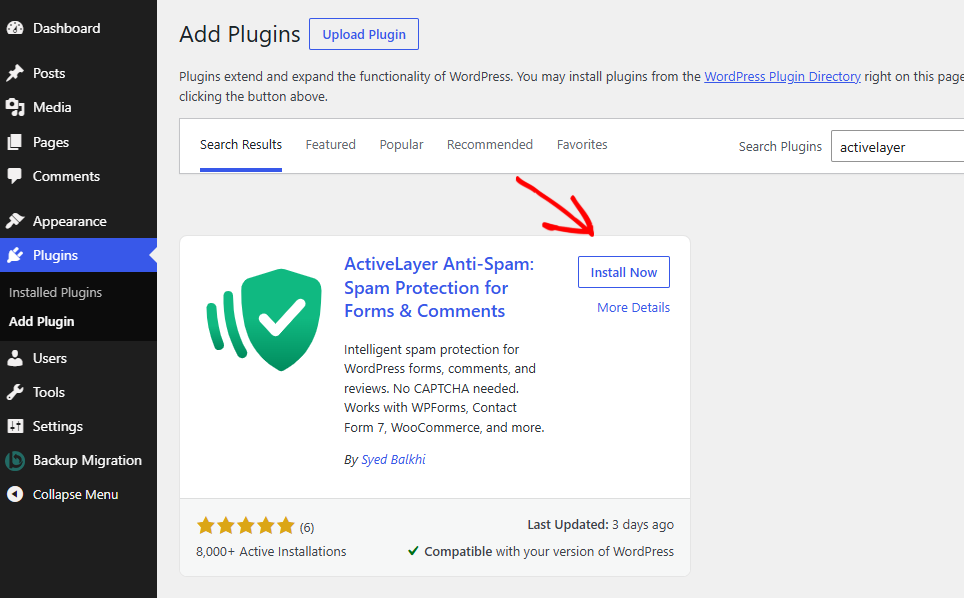
Next, you’ll need to install and activate the free ActiveLayer plugin. In your WordPress dashboard, go to Plugins > Add Plugin, search for ActiveLayer, and click Install Now. Once it’s installed, click Activate.
You’ll now see a new ActiveLayer item in your WordPress admin menu.
Connecting Your API Key
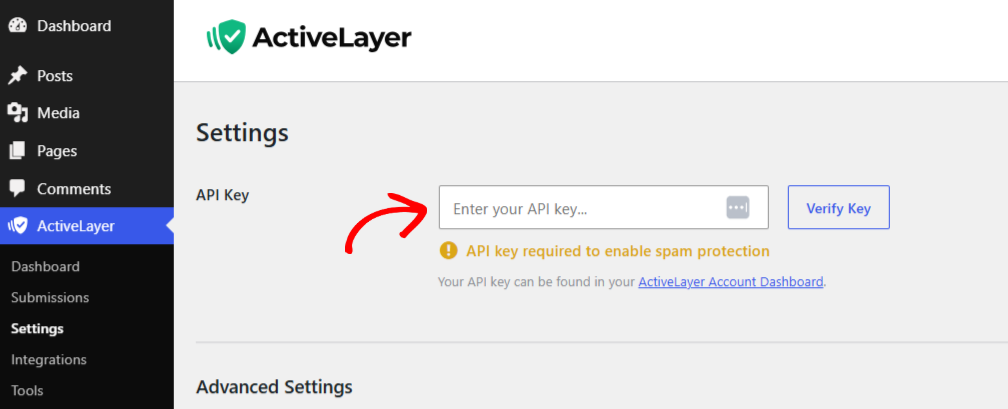
Then, go to ActiveLayer > Settings and paste your API key into the field. Click Verify Key to connect your site.
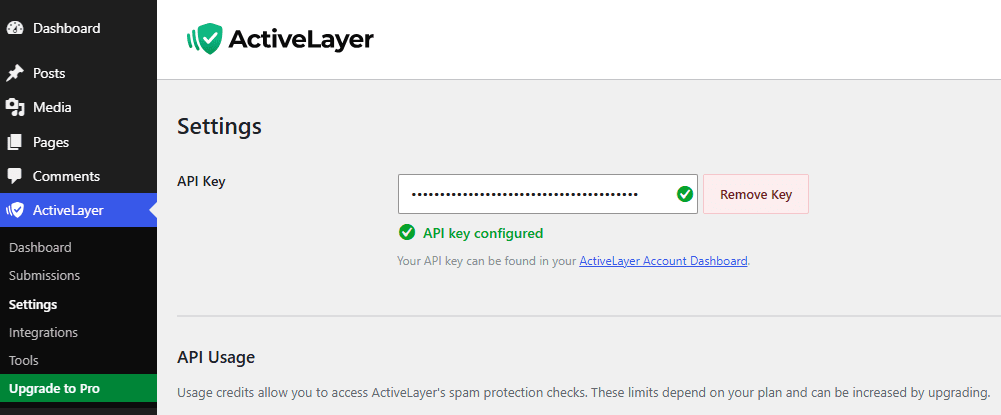
A green checkmark confirms that your site is connected.
Note: If verification fails, check that you haven’t copied any extra spaces at the start or end of your key.
Turning On WS Form Protection
Once your API key is verified, ActiveLayer automatically protects every WS Form form on your site. There’s no extra setting to turn on, and you don’t need to edit your forms.
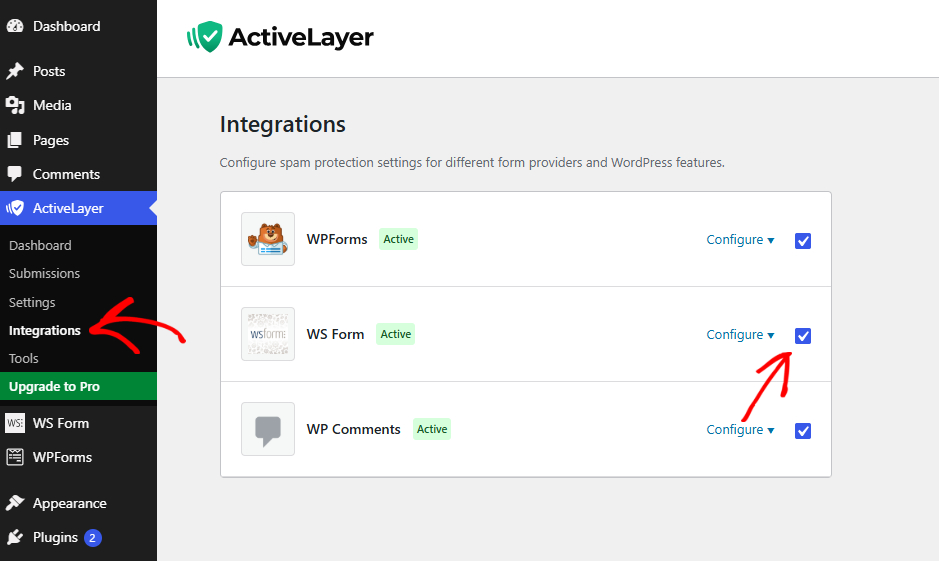
To confirm this, go to ActiveLayer > Integrations. You’ll see WS Form in the list with an Active badge.
ActiveLayer checks each submission during WS Form’s own validation. This happens after WS Form’s built-in checks, such as required fields and the honeypot, and before the entry is saved. If ActiveLayer flags a submission as spam, WS Form doesn’t save the entry, send notification emails, or run any actions like webhooks.
Turning Off Protection for a Specific Form (Optional)
If you’d like a form to skip ActiveLayer’s checks, such as an internal form only your team uses, you can turn protection off for that form alone.
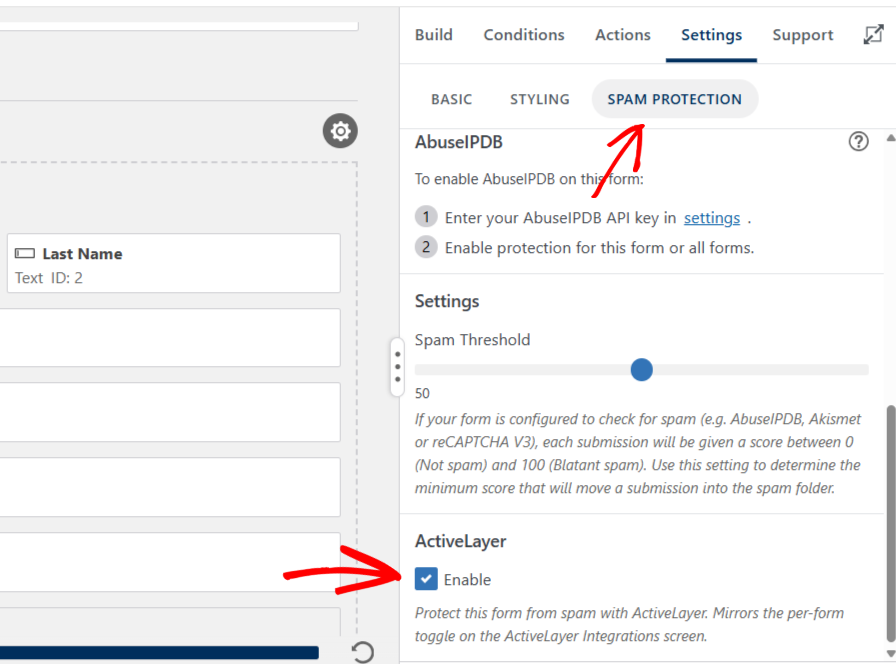
To do this, open the form in the WS Form editor and go to the Settings > Spam tab. You’ll find the ActiveLayer settings below the Spam Threshold option. Uncheck the Enable checkbox, then save your form.
You can also turn a form off from the ActiveLayer > Integrations. Click the Configure button next to WS Form, uncheck the form under Select which forms to protect, and click Save Settings. Both settings stay in sync, so a change in one place shows up in the other.
Note: Turning off ActiveLayer for one form doesn’t affect your other forms. They stay protected.
Reviewing Checked Submissions
ActiveLayer logs every submission it checks, both blocked and clean. To view it, go to ActiveLayer > Submissions.
Each entry is labeled with the name of the WS Form form it came from. You’ll also see the IP address, the status (clean or spam), and the date of the submission.
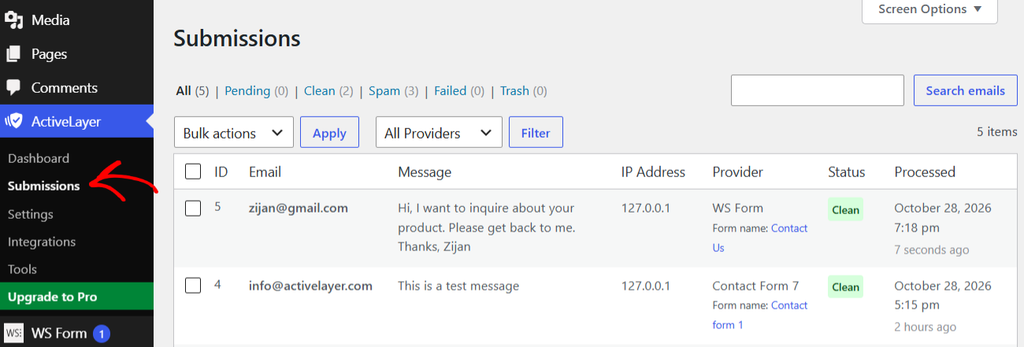
You can also see the same results on the Analytics page of your ActiveLayer dashboard at app.activelayer.com.
If ActiveLayer gets a verdict wrong, you can mark the entry as spam or clean right from the log. This helps improve future results.
Note: Visitors whose submission is blocked see this message on the form: Your submission was flagged as spam. Please try again or contact support. Developers can change this wording with a filter.
Testing Your Setup
Before you rely on ActiveLayer, it’s a good idea to send a test submission. To do this, open one of your forms on the front end of your site, fill it in the way a real visitor would, and submit it.
Then, check the Analytics page in your ActiveLayer dashboard, or go to ActiveLayer > Submissions on your site. Your test should appear at the top of the log within a few seconds, with a clean verdict. You’ll also find the entry in WS Form as usual.
That’s it! ActiveLayer is now checking your WS Form submissions and keeping spam out of your entries and inbox, without asking your visitors to solve a CAPTCHA.
Next, would you like to protect other plugins on your site? ActiveLayer also works with WPForms, WooCommerce, BuddyBoss and more. See all ActiveLayer integrations.
Still stuck? Contact ActiveLayer support, and we’ll help you get set up.
Frequently Asked Questions
Do I need to remove WS Form’s honeypot or other spam settings?
No. ActiveLayer runs after WS Form’s built-in checks, so you can keep the honeypot and IP throttling turned on. ActiveLayer adds an AI check on top of them.
What happens if ActiveLayer can’t be reached?
Your forms keep working. If the ActiveLayer service is unavailable, slow to respond, or your plan has run out of checks, submissions go through as if they passed. Protection resumes automatically once the service is available again.
Does ActiveLayer work with WS Form Lite?
Yes. ActiveLayer works with both WS Form Lite and WS Form Pro.
Will a blocked submission still trigger my notifications or integrations?
No. When ActiveLayer blocks a submission, WS Form doesn’t save the entry, send emails, or run actions like webhooks and integrations.