
How to Sign Up for ActiveLayer and Get Your API Key
Would you like to start blocking spam on your site with ActiveLayer?
Every ActiveLayer integration needs a free ActiveLayer account and an API key. Your API key is what connects your site to ActiveLayer’s spam checks.
This tutorial will show you how to sign up for ActiveLayer, create a project, and copy your API key.
To compare ActiveLayer’s plans before you start, visit our pricing page.
In This Article:
Requirements:
- You’ll need an email address or a Google or GitHub account to sign up with.
Signing Up for ActiveLayer
To get started, go to app.activelayer.com and fill in your name and email address. Next, enter a password and type it again to confirm it. Then, click Sign up.
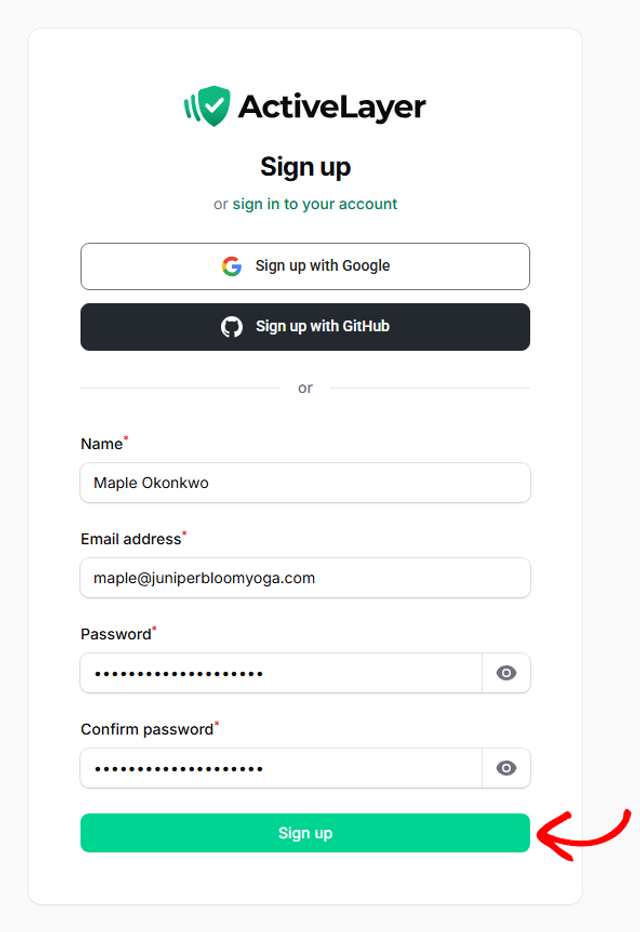
If you prefer, you can also sign up with your Google or GitHub account using the buttons at the top of the form.
Choosing Your Plan
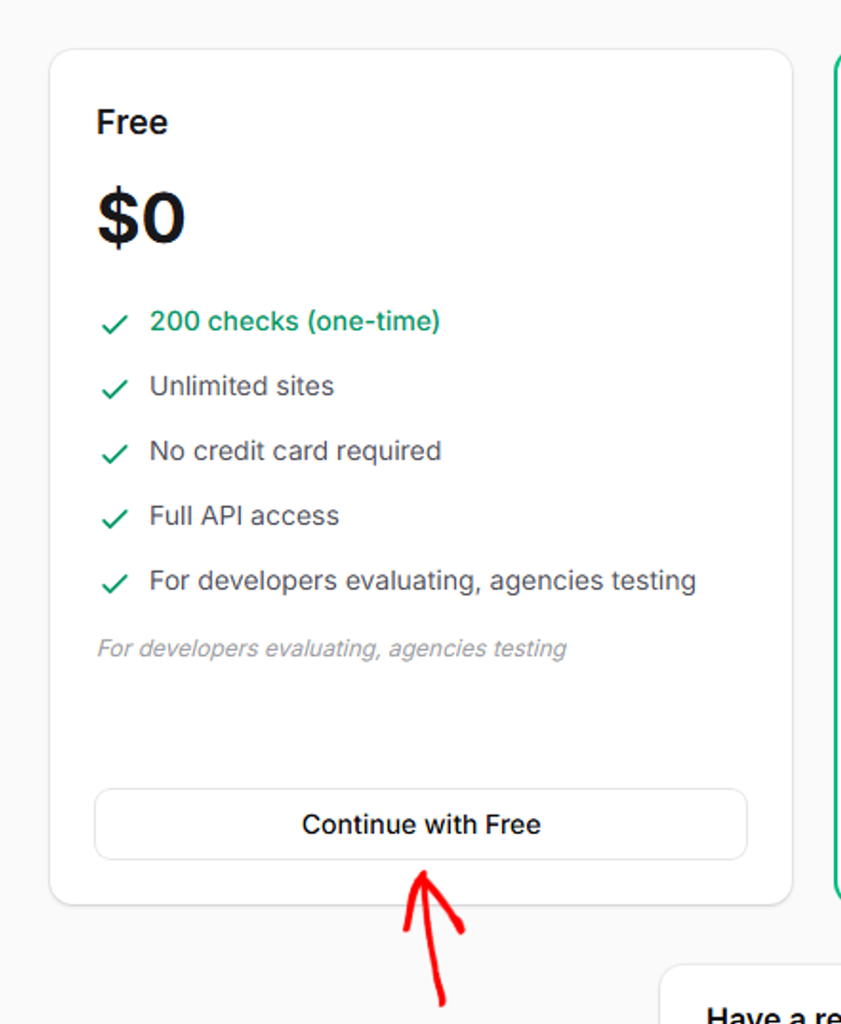
Once you’ve signed up, ActiveLayer asks you to choose a plan. The free plan includes 200 spam checks, covers unlimited sites, and doesn’t require a credit card. If you already know you’ll need more checks, the Pro and Enterprise plans are on the same page.
To start for free, click Continue with Free under the Free plan.
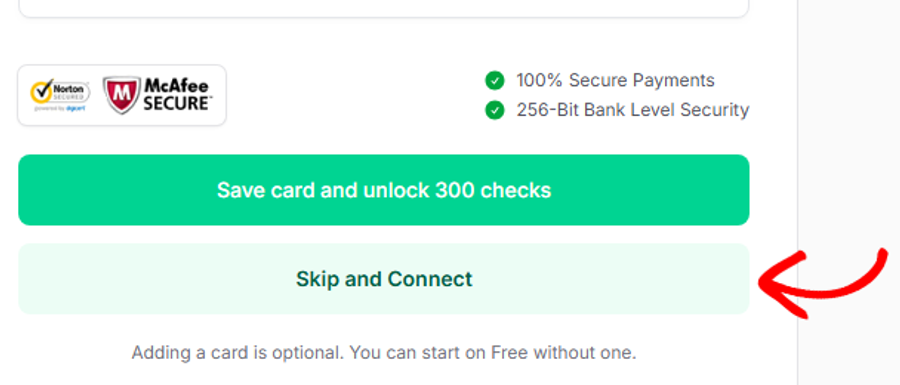
Next, ActiveLayer offers 100 bonus spam checks if you add a card. Adding a card is optional. You won’t be charged today.
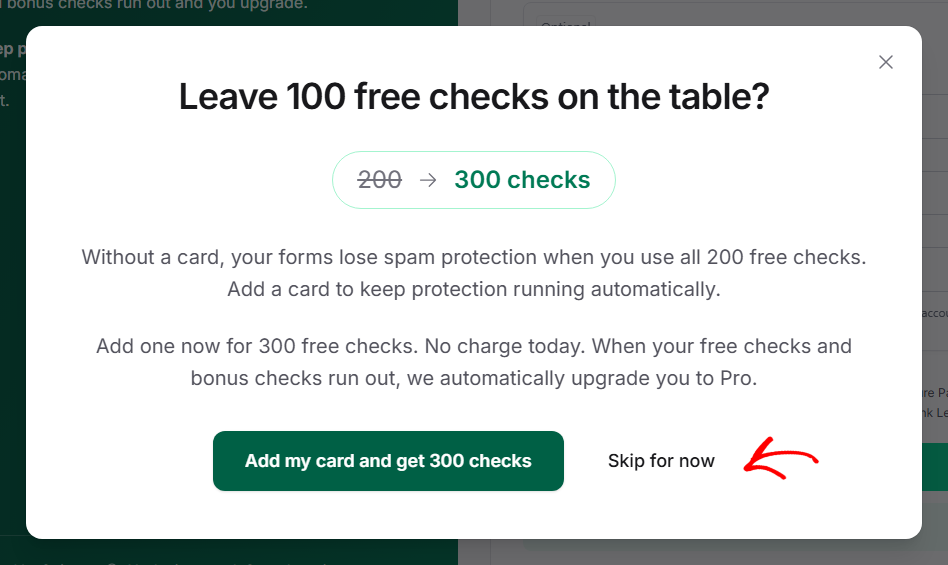
With a card on file, ActiveLayer automatically upgrades you to Pro if you go past your free checks, so protection keeps running. Without a card, spam protection stops when you’ve used all 200 free checks. If you just want to try ActiveLayer first, you can start on the free plan without a card.
To add a card, enter your card details. Then, click Save card and unlock 300 checks. To start without a card, click Skip and Connect.
If you skip the card, an overlay asks you to confirm. To continue on the free plan without a card, click Skip for now.
ActiveLayer then takes you straight to creating your first project.
Creating Your Project
You’ll now see the Create a New Project page. A project gives your site the API key it needs to connect to ActiveLayer.
In the Project Name field, enter a name you’ll recognize, such as your site’s name. You can change it later.
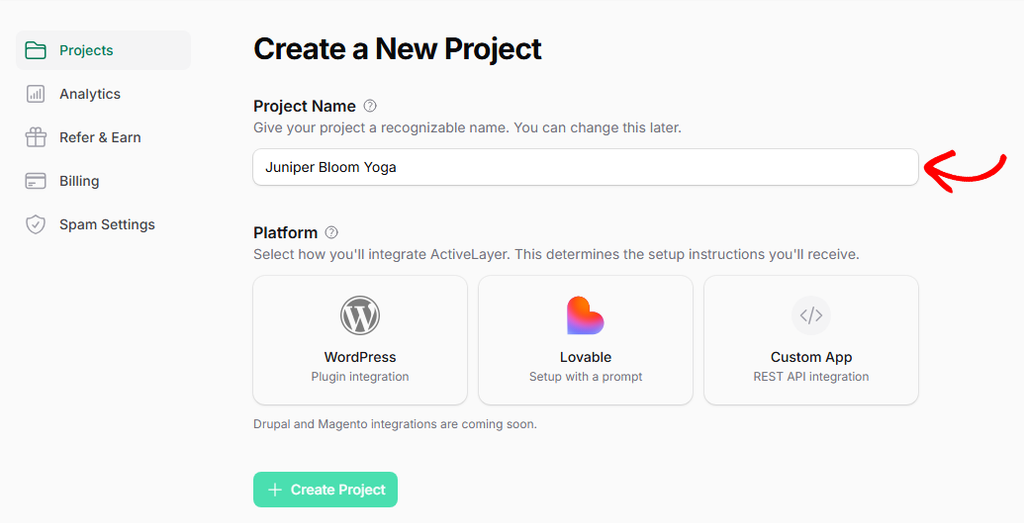
Under Platform, select how you’ll use ActiveLayer. This choice sets the setup instructions you’ll see next:
- WordPress: Choose this if you’ll use the ActiveLayer WordPress plugin. This is the right choice for every ActiveLayer WordPress integration.
- Lovable: Choose this if you’re adding ActiveLayer to an app built with Lovable.
- Custom App: Choose this if you’re connecting your own app through the REST API.
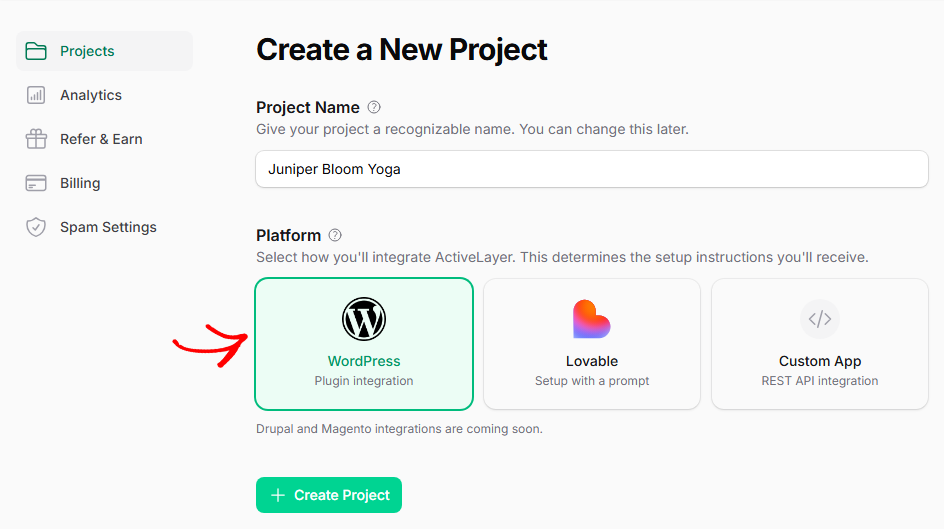
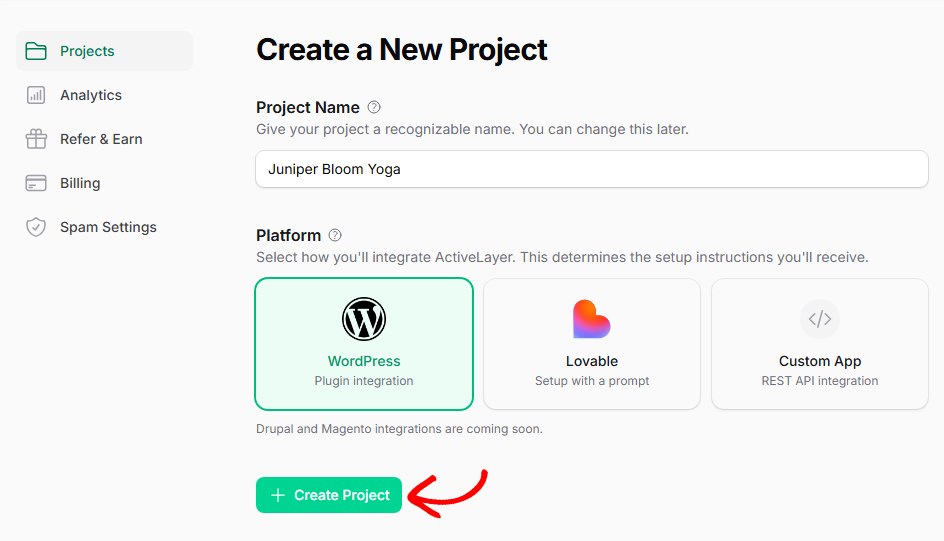
When you’re ready, click Create Project.
Copying Your ActiveLayer API Key
Your new project page shows its API key. To copy the key, click the copy icon at the end of the API Key field.
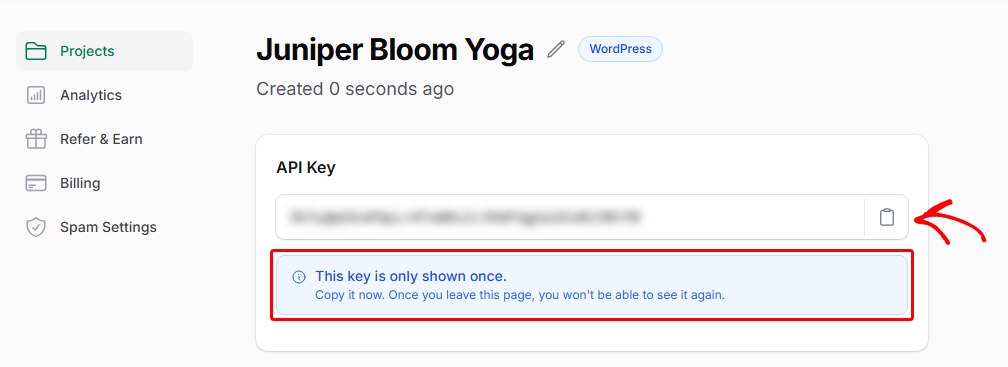
Note: Your API key is only shown once. Copy it somewhere safe before you leave this page.
If you lose it, open your project page in ActiveLayer, where the key now shows as dots. Then, click Regenerate Key to get a new one.
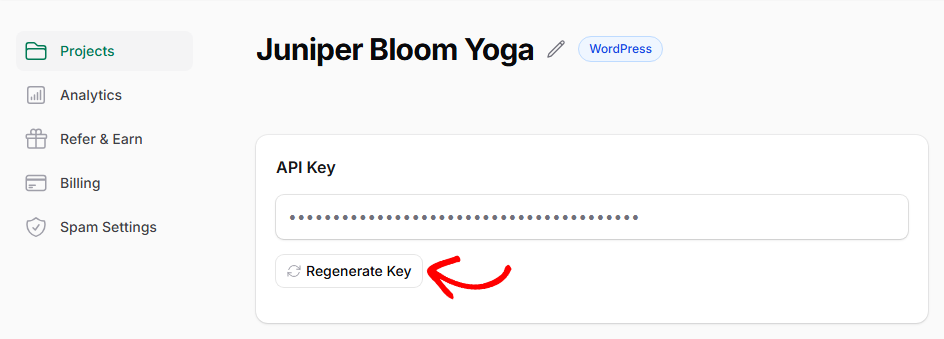
ActiveLayer asks you to confirm, because a new key turns off your current one right away. Any site still using the old key stops being protected until you paste the new key into its ActiveLayer settings.
Below the key, the project page also shows setup instructions for the platform you chose.
That’s it! You now have a free ActiveLayer account and an API key, ready to connect to your site.
Next, would you like to enable ActiveLayer spam protection on your site? Each integration guide shows how to install the ActiveLayer plugin, paste your key, and turn on protection. See all ActiveLayer integrations.
Need help? Contact ActiveLayer support, and we’ll help you get set up.
Frequently Asked Questions
Is ActiveLayer free?
Yes. The free plan includes a one-time allowance of 200 spam checks, covers unlimited sites, and doesn’t require a credit card. If you add a card during sign-up, you get 300 free checks instead, with no charge today. Without a card, spam protection stops when you’ve used all your free checks.
Do I need a credit card to sign up?
No. Adding a card is optional. To start without one, click Skip and Connect, then Skip for now.
What happens if I lose my API key?
You can get a new one. Because ActiveLayer only shows your key once, later visits to your project page show it as dots. To get a new key, open your project in ActiveLayer and click Regenerate Key. Because your old key stops working as soon as you confirm, paste the new key into your site’s ActiveLayer settings right away.
Which platform should I choose for a WordPress site?
Choose WordPress. It works with every ActiveLayer WordPress integration, including form plugins, comments, and store plugins.
Is ActiveLayer available for custom apps?
Yes. When you create your project, select Custom App under Platform, and ActiveLayer shows setup instructions for its REST API. For the full details, see the ActiveLayer API User Guide. ActiveLayer also has guides for frameworks such as Laravel, Django, Next.js, and Node.js on its integrations page.